
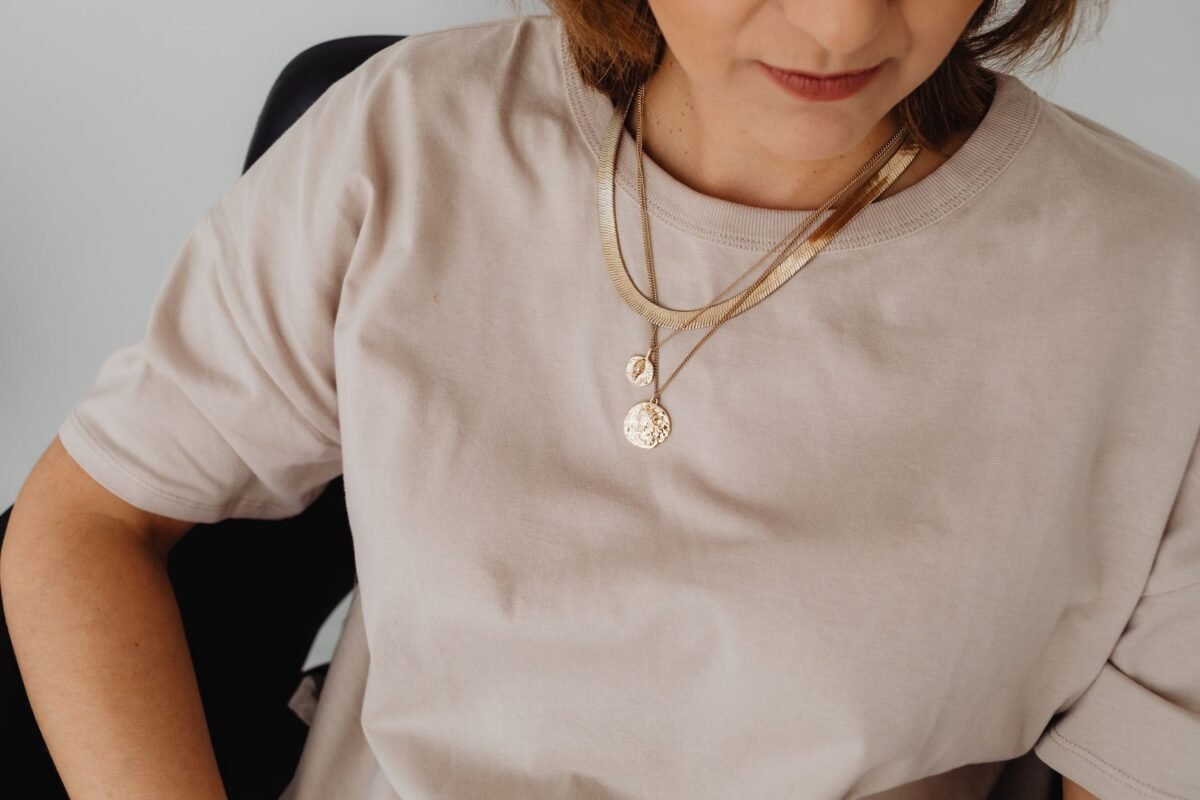
A well-curated necklace stack is one of the most effortless ways to elevate an everyday outfit. Whether you are pairing a classic crewneck tee with a hint of gold or dressing up an open neckline for evening drinks, layered chains add depth, dimension, and personal flair. Yet, for many jewelry lovers, the dream of an effortlessly chic neck stack quickly descends into a midday nightmare of twisted metals, migrated clasps, and stubborn knots.
The good news is that jewelry tangling is not an inevitable tax you must pay for looking put together. It is simply a matter of physics. Necklaces twist when chains of identical weights and lengths swing at the same frequency as you move throughout your day. By understanding how different chains interact and applying a few smart styling techniques, you can keep your favorite pieces beautifully separated from morning to night.
Why Do Layered Necklaces Tangle?
Before diving into styling formulas, it helps to understand why necklaces tangle in the first place. When you walk, turn your head, or adjust your posture, your necklaces sway. If two necklaces have identical chain widths, similar link structures, and nearly identical lengths, they will constantly collide and catch against each other. Gravity and body movement naturally weave them into a tight knot.
Furthermore, clasps are often the heaviest part of a delicate chain. As you move, clasps naturally slide forward toward the front of your chest, catching on neighboring chains and pulling everything into an unruly cluster. Preventing this frustration comes down to three core principles: variation in length, variation in weight, and intentional styling hardware.
Step 1: Stagger Your Lengths Strategically
The most fundamental rule of necklace layering is the spacing rule. Layering two necklaces of the exact same length guarantees they will intertwine within minutes. To prevent overlap, aim for at least a one-and-a-half to two-inch difference between each piece in your stack.
A standard three-necklace progression looks like this:
- Base Layer (14 to 15 inches): A choker or short collar chain that sits snug along the base of the throat or collarbone. Because it stays close to your skin, it moves very little and acts as a stable frame.
- Mid Layer (16 to 18 inches): The traditional resting spot for everyday pendants and medium-width chains. This layer sits comfortably below the collarbone and frames the lower chest.
- Anchor Layer (20 to 24 inches or longer): A longer, weighted chain or dramatic pendant that draws the eye downward, stabilizing the visual line and staying well below the higher pieces.
If you are new to curating your own combinations, you can always explore layering necklace sets that feature pre-measured lengths specifically balanced to stay separated while you wear them.
Step 2: Mix Chain Textures and Weights
Even if you stagger your lengths, two ultra-fine cable chains can still find a way to tangle if static electricity or rapid movement pulls them together. The secret weapon among professional stylists is texture contrast.
Pairing different chain styles prevents individual links from locking into one another. Consider blending contrasting chain profiles across your stack:
- Flat Chains: Herringbone and snake chains lie flat against the skin and glide smoothly, making them far less prone to catching on surrounding links.
- Open-Link Chains: Paperclip, rolo, and elongated oval links provide negative space and a modern, airy feel.
- Textured Chains: Rope, curb, and figaro chains bring visual interest and substantial tactile weight.
By placing a heavier, structured chain—like a bold paperclip or a flat snake chain—between two delicate pieces, you create a physical barrier that keeps the lighter strands from winding around one another.
Step 3: Choose One Central Focal Point
A common mistake when building a necklace stack is adding charms or pendants to every single layer. When multiple charms hang at different tiers, they inevitably sway into each other, clinking loudly and spinning their chains into knots. Instead, build your stack around a single focal point and keep the supporting layers sleek and streamlined.
Your focal piece should carry the most personality and visual weight. You might choose a coin medallion, an organic pearl drop, or decide to shop custom nameplate necklaces that give your stack an intimate, personalized feel. Once your centerpiece is in place, surround it with simple, pendant-free chains that highlight your primary charm without competing for physical space.
Step 4: Master the Clasp and Extender Tricks
Small hardware adjustments can make a dramatic difference in how your stack behaves throughout the day. If your favorite pieces happen to be similar lengths, you do not need to retire them—you just need a few styling workarounds.
Use Chain Extenders for Custom Spacing
Removable chain extenders (usually measuring one to three inches) are inexpensive lifesavers. Adding a two-inch extender to the clasp of a 16-inch chain immediately transforms it into an 18-inch layer, giving you the precise gap required to prevent snags.
The Reverse-Clasp Method
If you find that your clasps always wander to the front, try alternating how you fasten them. Clasp your shortest necklace from right to left as usual, but fasten your middle necklace in reverse (hooking left to right). Because the clasps pull in opposite directions during natural movement, they act as counterweights against each other, drastically reducing their tendency to migrate together toward your pendant.
Try a Multi-Strand Necklace Detangler
A necklace spacer or detangler clasp is a small magnetic or slide-lock bar with two, three, or four loops on each side. You attach the clasps of your individual necklaces to the spacer bar once, and then secure the entire unit behind your neck with a single click. The spacer maintains a constant physical separation between the chain ends, preventing the clasps from spinning around your neck and weaving your chains together.
Step 5: Factor in Your Fabric and Neckline
Your jewelry does not exist in a vacuum; the clothing you wear plays a direct role in whether your necklaces stay pristine. Textured fabrics, such as loose-knit sweaters, bouclé, and brushed wool, act like Velcro to fine chains. As you move, the fabric fibers grab delicate links, twisting them together and pulling the stack out of alignment.
When wearing chunky knits, stick to smoother, heavier pieces like bold chains, flat snake links, or heavier collars. If you prefer delicate multi-strand layering, pair your stack with smooth textiles like silk, cotton, poplin, or directly against bare skin with an open V-neck or scoop neckline. When you want versatile pieces that withstand everyday wear without tarnishing against fabric, it is wise to browse demi-fine chains made from durable materials like 18k gold vermeil or sterling silver.
How to Safely Untangle Knotted Necklaces
Even with careful styling, a restless evening or an accidental drop into a jewelry tray can result in an intimidating knot. If you find your chains tangled, avoid the temptation to yank or pull forcefully, which can stretch fine links or snap delicate soldered joints.
Instead, follow this gentle rescue method:
- Lay it flat: Place the tangled necklaces on a flat, well-lit surface, such as a white plate or clean tabletop. Working in your hands adds gravitational tension that tightens knots.
- Unfasten all clasps: Open every single clasp to release internal tension along the chains.
- Apply a lubricant: Place a single drop of baby oil, olive oil, or a dusting of cornstarch directly over the center of the knot to reduce friction between the metal links.
- Use two sewing pins: Insert the tips of two sewing needles or straight pins into the core of the knot. Gently wiggle the needles outward in opposite directions to tease the knot apart without pulling the metal tight.
- Rinse and clean: Once freed, wash away any oil with warm water and mild liquid soap, then pat dry thoroughly with a microfiber cloth.
Build a Tangle-Free Foundation
Mastering the art of necklace layering is all about balance. By thoughtfully varying your chain lengths, balancing weights and link textures, limiting your pendants, and utilizing simple tools like extenders or multi-clasp bars, you can wear your favorite pieces with complete confidence. Step out in a dynamic, customized stack that stays polished, separated, and tangle-free all day long.
Disclosure: This post contains affiliate links. If you click through and make a purchase, we may earn a commission at no additional cost to you. We only recommend products or services we believe add value to our readers.